


Table of contents
- What are we learning 🤔 ?
- Understanding ERC 20 standard 🤓
- The main functions for making your token 👀
- Setting up basic project 🧐
- Deciding the total supply of coin ⚖️
- Events 💼
- Getting the money matters right 💰
- Constructor is the gold mine 👑
- Deploying the coin 🤖
- Getting our new coin on metamask 🦊
- Getting our coin on uniswap 🦄
- The easy way
What are we learning 🤔 ?
Hello Builders 😎
Here in this brand new step by step self-paced course, we will be launching our own token with a name and symbol of our choice and then we will deploy the token on a test net and list it on uniswap so that users can trade it with other tokens and then we will build an awesome frontend so that people can purchase our token.
Fun fact : A meme token named Shiba Inu built on ERC 20 token standard has a current market cap of 12 billion USD
So who knows your own token can also achieve this status and can become one of the largest cryptocurrencies in the world & we will be doing everything to achieve that.
The step by step guide is as follows :
Setting up our development environment
Writing code for our token
Deploying the token on testnet
Getting your token on metamask
Listing the token on uniswap
Launching the token
So, are you ready to hop on this crazy ride , let's go !
Understanding ERC 20 standard 🤓
Before moving further we need to understand about the backbone, powering the cryptocurrencies on ethereum which is erc 20 standard.
- ERC 20*
ERC stands for ethereum request for comment and ERC 20 is the standard for making tokens on ethereum virtual machine. It is a set of functions that every token needs to follow in order to be called an erc 20 token. ERC 20 standard is used for having uniformity in different tokens to get a seamless experience within the ethereum ecosystem like they can be exchanged with one another .
Wallets like metamask are designed to expect these functions in a smart contract while accepting a new cryptocurrency.
ERC 20 was mentioned in Ethereum Improvement Proposal -20 or EIP-20. You can read more about that here : https://github.com/ethereum/EIPs/blob/f98a60e1b1590c9cfa0bfe66c4e6a674e54cd386/EIPS/eip-20.md
ERC-20 standard describes six functions that maintain some functionalities and features of Ethereum-based digital tokens. These functions include the way tokens are transferred between addresses and some important data related to the token smart contract, such as symbol, name, and supply.
The main functions for making your token 👀
Let’s see and understand about the main functions of ERC-20 for making our token
- totalSupply - This function will return the total number of tokens which can ever exist .In this function we have to specify the total supply of tokens.
- balanceof - This function returns the amount of tokens owned by the account.
- transfer - This function transfers
_valueamount of tokens to address_to - transferFrom - This function transfers
_valueamount of tokens from address_fromto address_to - allowance - This function returns the remaining number of tokens that
spenderwill be allowed to spend on behalf ofownerthrough[transferFrom](https://docs.openzeppelin.com/contracts/2.x/api/token/erc20#IERC20-transferFrom-address-address-uint256-). This is zero by default. - approve - This function allows
_spenderto withdraw from your account multiple times, up to the_valueamount. If this function is called again it overwrites the current allowance with_value.
Setting up basic project 🧐
Now, Let’s start coding our token’s smart contract.
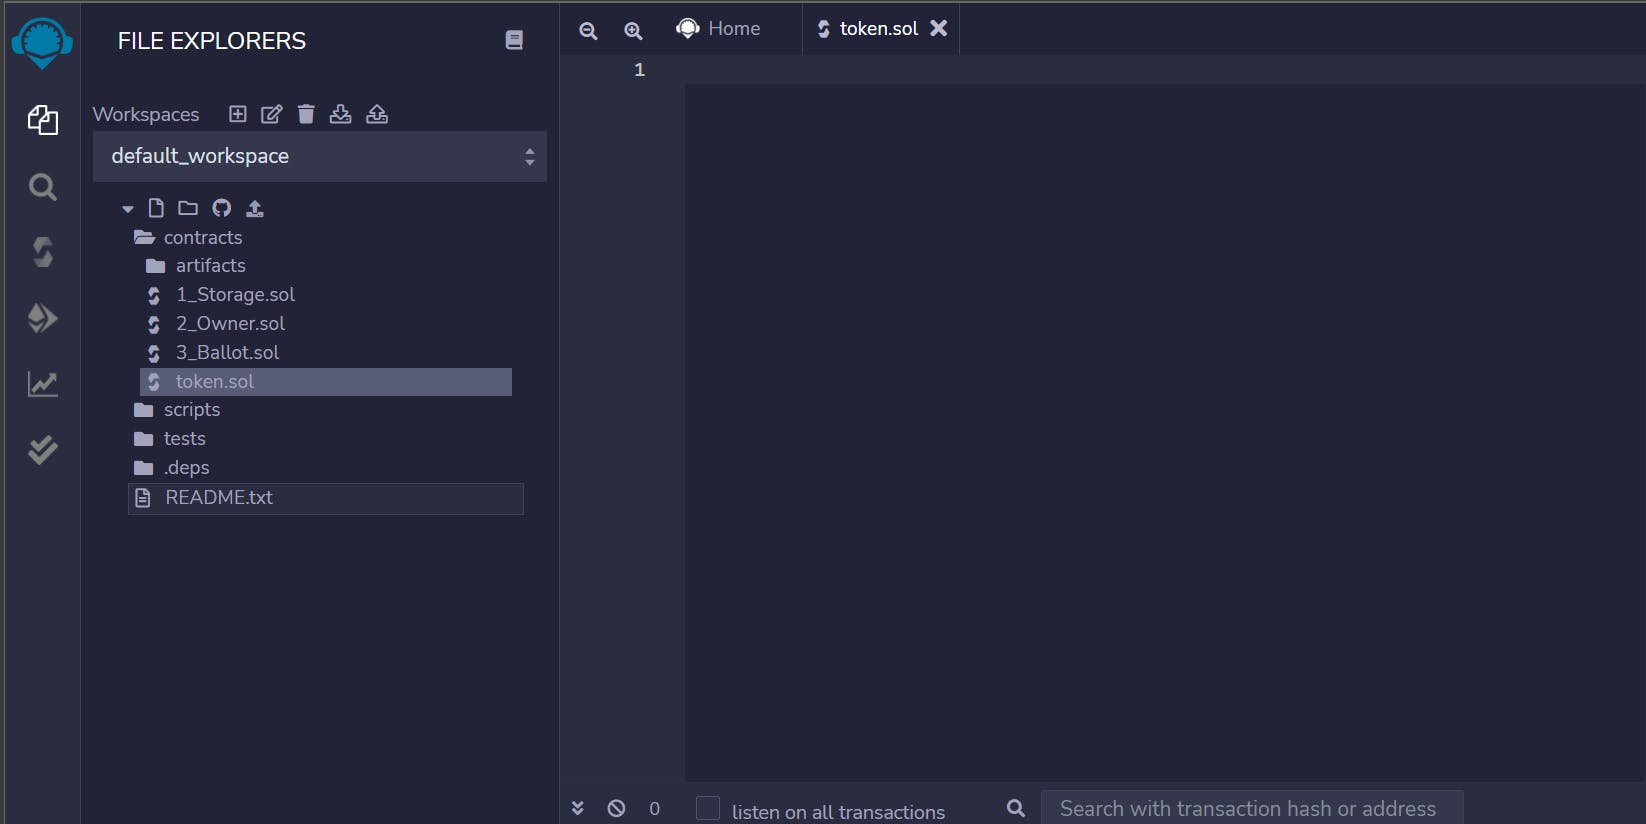
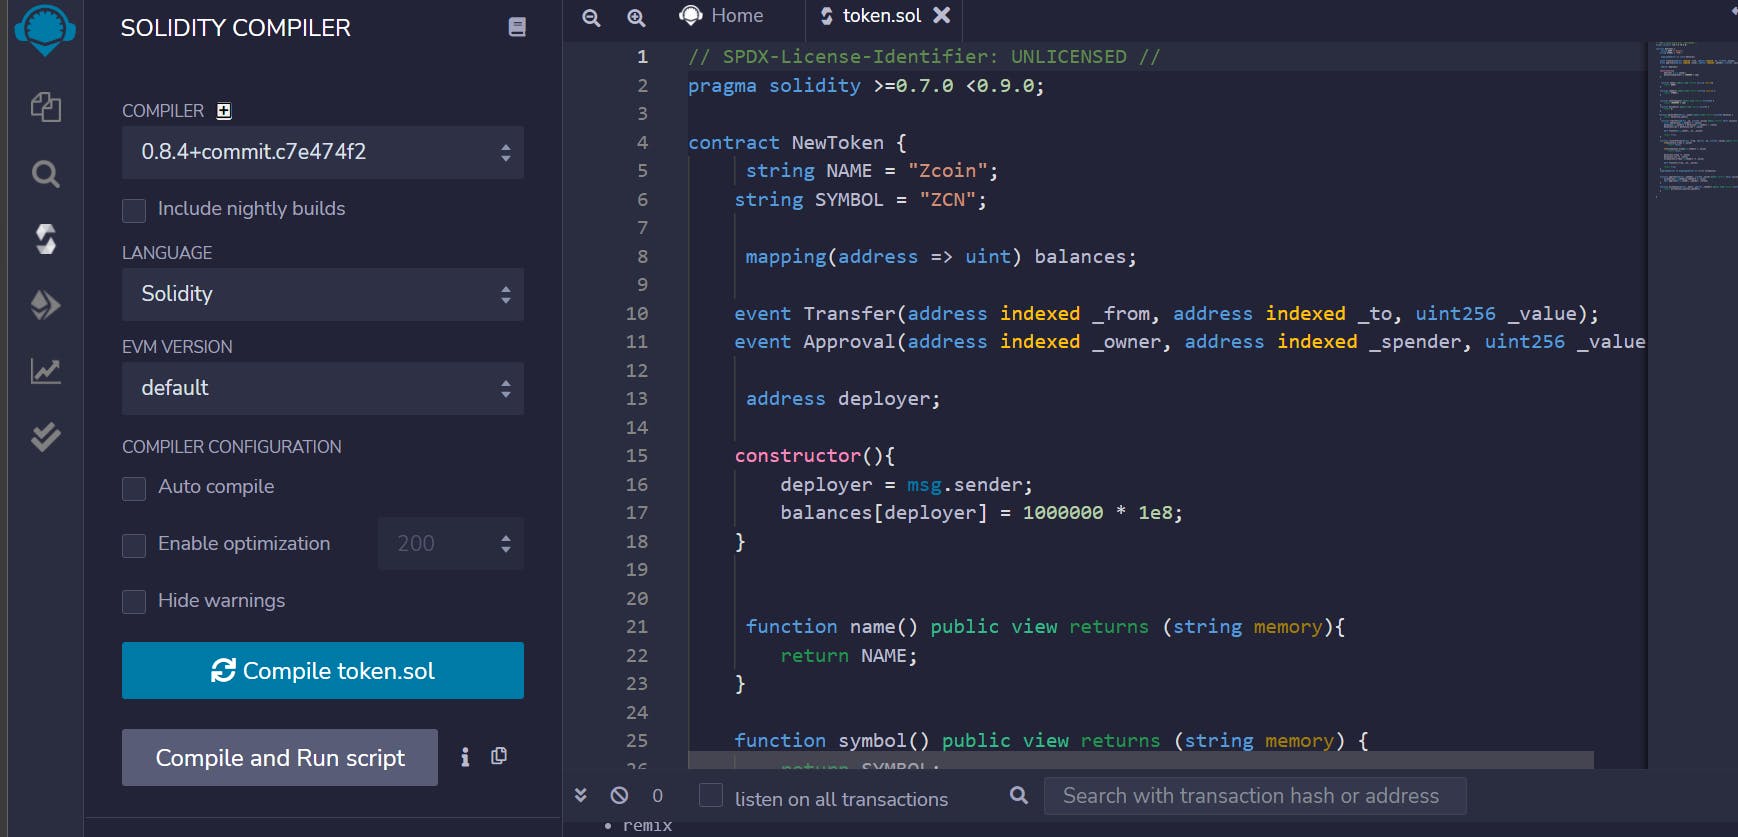
For coding we will be using remix . Remix is a browser based IDE with built in solidity compiler so it will be easy and convenient to use.
Head over to remix.ethereum.org and in the contracts directory make a new file named token.sol
.sol is the extension for solidity files.
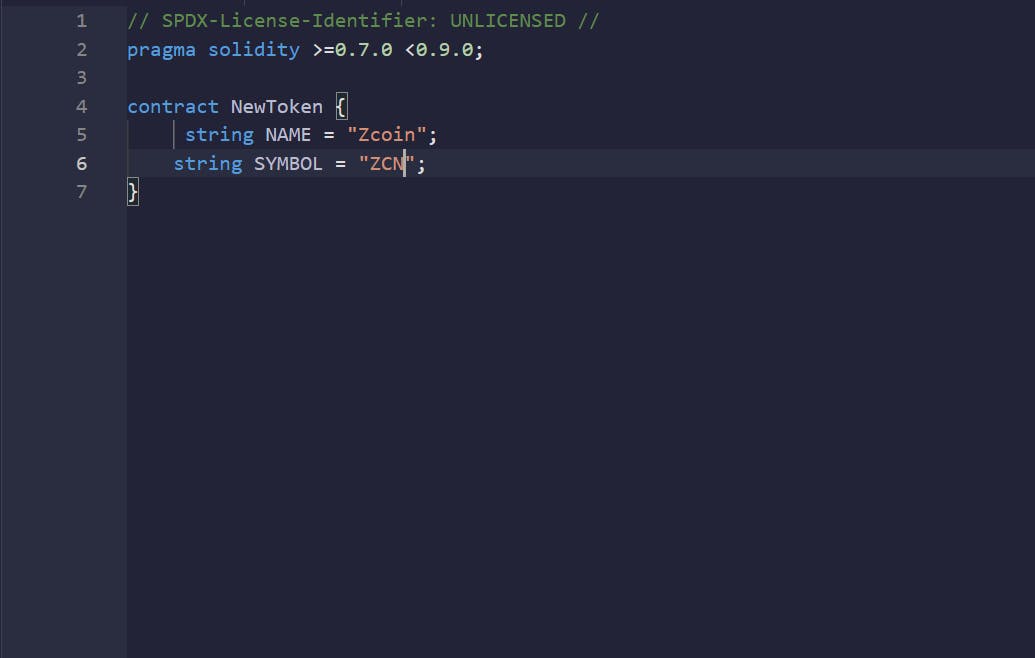
Make a new contract and give it a name you want .
Now we made a contract NewToken and inside the token let’s declare the name and symbol of our token .
Here we are naming our token Zcoin and the symbol ZCN .
Give your token a different name, Play with it around and give your token a unique name it can be pizzacoin or frytoken . It can be anything you want ,no restrictions .
You can see the list of all the available crypto tokens in the markets here : https://coinmarketcap.com/
// SPDX-License-Identifier: MIT
pragma solidity >=0.7.0 <0.9.0;

contract NewToken {
    string NAME = "ZCoin";
    string SYMBOL = "ZCN";
}
Let’s understand the code line by line
- In line 1 we have declared license identifier which is mandatory for all solidity files.
- In line 2 we have written the pragma command which tells the compiler the version of solidity we are using .
- In line 3 we have declared our contract, contracts in solidity are same like classes in C++ or java.
- Under the contract we have declared two strings which are our token’s name and symbol.
. Naming the coin 👓
Let’s make functions to retrieve our token’s name and symbol from our contract .
The strings that we declared inside our contract are private ,so as to access them we have to make functions for them.

function name() public view returns (string memory){
        return NAME;
    }

    function symbol() public view returns (string memory) {
        return SYMBOL;
    }
The name and symbol functions are public.
Public functions in solidity can be called from anywhere.
These functions returns string memory.
Memory keyword in Solidity tells the compiler that after returning the variable, it can erase it from the memory stack.
Deciding the total supply of coin ⚖️
Now comes the most important part of our token smart contract ,which is to decide on the total supply of our own token.
As we know in crypto currencies are of two types : inflationary and fixed.
We can take the example of bitcoin for fixed and eth for inflationary currency.
In Inflationary currency the number of coins in circulation keeps increasing with time which means that the function totalSupply() returns a higher number each time we call it.
On the other hand fixed currencies define how many coins will ever be in circulation. This creates scarcity, and drives up the prices on the exchanges when demand for the coins increases.
Bitcoin is not an ERC-20 token but COMP (Compound) is a fixed supply erc 20 token which have a fixed supply for 10 M coins
In this tutorial we are making a fixed supply token so let’s write the functions for that
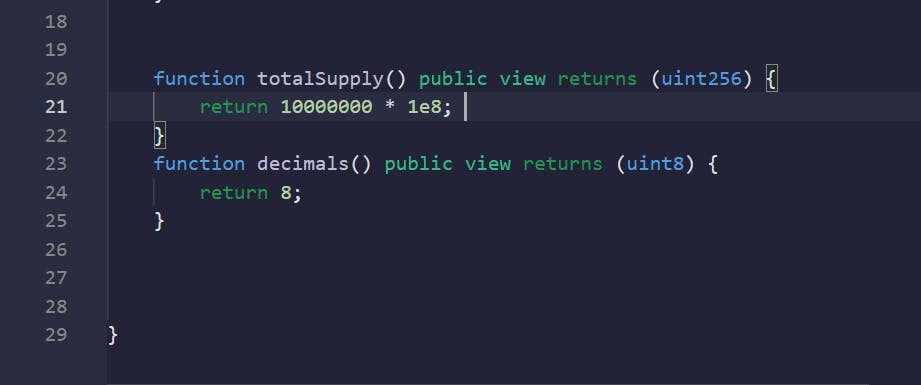
function totalSupply() public view returns (uint256) {
        return 10000000 * 1e8; //10M * 10^8 because decimals is 8
    }
function decimals() public view returns (uint8) {
        return 8;
    }
In the function we have declared our token’s supply as 10 million coins .
You are also seeing an additional function decimals but what is this for , Let’s understand
This function tells that how divisible our coin can get .
For example an eth can be divided into wei and gwei .
Similarly, how divisible our token can get , we will decide it with the help of decimal function .
Here our function returns 8 it means that our token is divisible to the value of 10 raise to the power of 8 .
1 token can be divided upto 0.00000001 token’s value.
Events 💼
Events in solidity are a way to communicate with a client application or front-end website that something has happened on the blockchain.

event Transfer(address indexed _from, address indexed _to, uint256 _value);
event Approval(address indexed _owner, address indexed _spender, uint256 _value);
In our smart contract we have have two events which are transfer and approval
The transfer event gets triggered whenever there is a transfer to be made of our token from one address to another.
The approval event is for the owner of the contract to approve the spending of the spender of our token.
These two events are also in the EIP-20 and are mandatory in an ERC-20 token.
Getting the money matters right 💰
In this section , we will understand the functions to get balance, transferring the coins
Now we will make the function to get the total balance of our coins in an address
For this we first have to declare a mapping for balances.
Mapping in solidity are used to store the data in the form of key-value pairs. Mappings are mostly used to associate the unique Ethereum address with the associated value type.
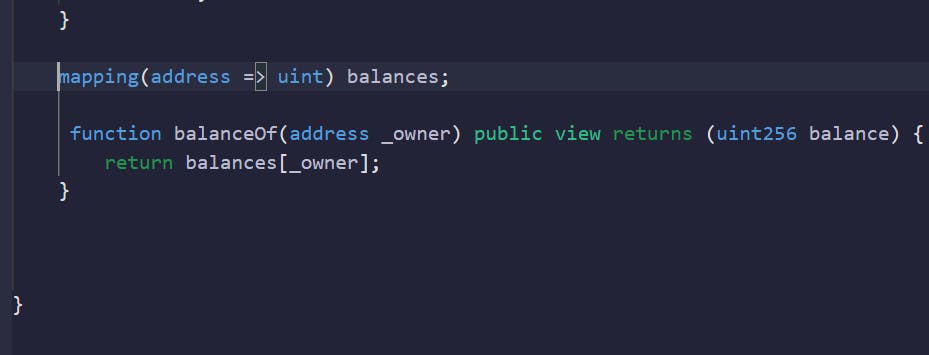
mapping(address => uint) balances;
function balanceOf(address _owner) public view returns (uint256 balance) {
        return balances[_owner];
    }
The function here returns the balance of the contract .
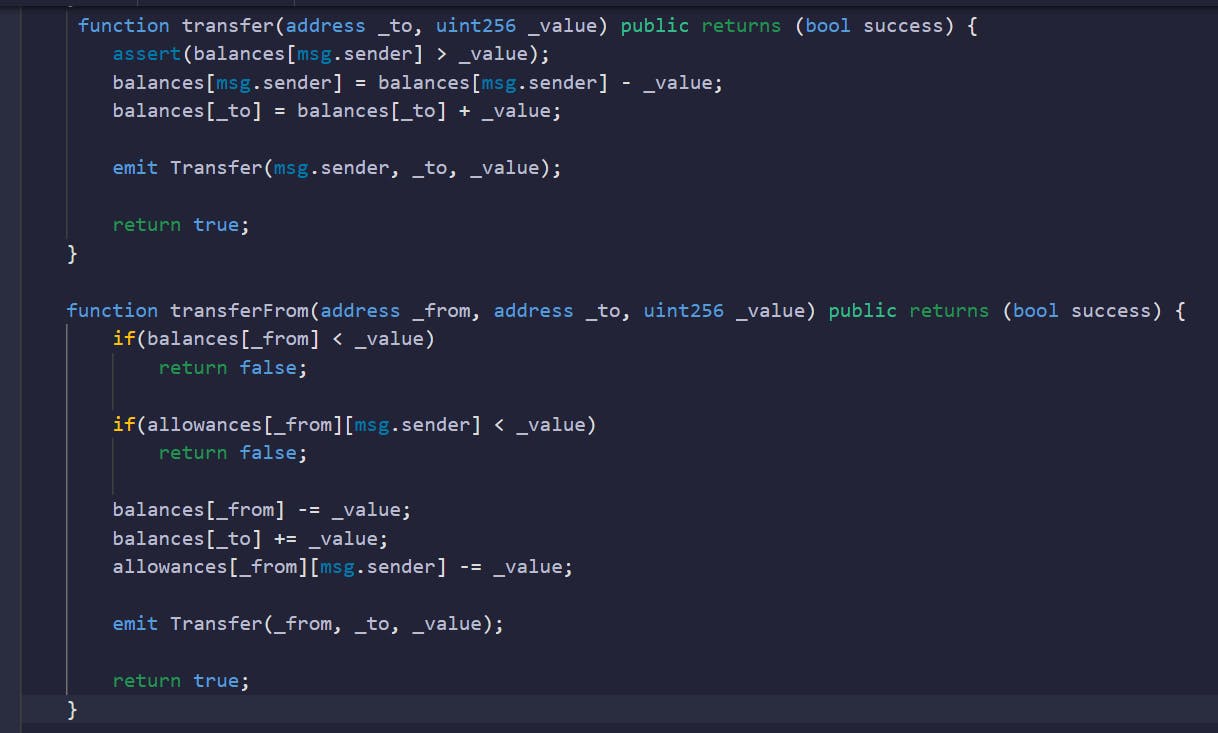
function transfer(address _to, uint256 _value) public returns (bool success) {
        assert(balances[msg.sender] > _value);
        balances[msg.sender] = balances[msg.sender] - _value;
        balances[_to] = balances[_to] + _value;

        emit Transfer(msg.sender, _to, _value);

        return true;
    }

    function transferFrom(address _from, address _to, uint256 _value) public returns (bool success) {
        if(balances[_from] < _value)
            return false;

        if(allowances[_from][msg.sender] < _value)
            return false;

        balances[_from] -= _value;
        balances[_to] += _value;
        allowances[_from][msg.sender] -= _value;

        emit Transfer(_from, _to, _value);

        return true;
    }
The transfer function is used to transfer a value of tokens from our smart contract to another address .
This function checks if the contract has the amount more than it is sending to the address and also check the allowance means that if the caller of the contract have the permission to spend the amount on the contract’s behalf or not.
Then after checking it reduces that much amount of tokens from our contract and emits a transfer event and completes the process.
Similarly the transferfrom function is used to transfer the tokens from one address to another .
This function checks if the sender of tokens has sufficient amount of tokens in his/her account and then it completes the transaction by emitting the transfer event.

mapping(address => mapping(address => uint)) allowances;


    function approve(address _spender, uint256 _value) public returns (bool success) {
        allowances[msg.sender][_spender] = _value;
        emit Approval(msg.sender, _spender, _value);
    }

    function allowance(address _owner, address _spender) public view returns (uint256 remaining) {
        return allowances[_owner][_spender];
    }
For the approve and allowance functions we have declared a mapping of mapping to give an address the permission to spend tokens on behalf of token’s smart contract.
The approve function gives the contract’s caller the allowance to spend tokens and then it completes the final process by emitting the approval event .
Similarly,the approve function declares the definition of allowances.
Constructor is the gold mine 👑
We have made the token ,we are the creator so we deserve to be rewarded and we can reward ourselves by giving us 1 million tokens out of 10 M tokens.
But how can we do that,
We can do that with the help of constructor.
The constructor will get executed only once in the lifetime of contract at the time of deployment.
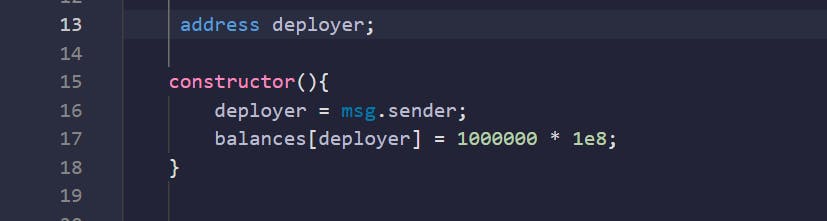
address deployer;

    constructor(){
        deployer = msg.sender;
        balances[deployer] = 1000000 * 1e8;
    }
For constructor we will declare a field deployer of the type address and then in the constructor we will update the balance of the sender of the contract that is the deployer of the contract by 1 M coins .By this method we got 1 M of our tokens .
If you want more of your tokens in your wallet you can update the value in the function.
Deploying the coin 🤖
Now is the time to finally deploy our token.
We are going to deploy our token on ropsten testnet so before deploying you should have some ropsten test eth in your metamask wallet .
You can get your test eth from here : https://faucet.egorfine.com/
Just go to this website ,Enter your address and you will get your test eth easily.
Now let’s come to the main part
In the remix workspace click on solidity compiler tab and then press the compile token.sol button .
After compilation you can get some warnings in yellow ,ignore them for now and then go to the deploy tab.
From the dropdown menu change your environment from javascript vm to injected web3.
A new metamask popup will appear to enter your password. Enter your metamask password and then it will connect your wallet to remix.
Now press the deploy button ,
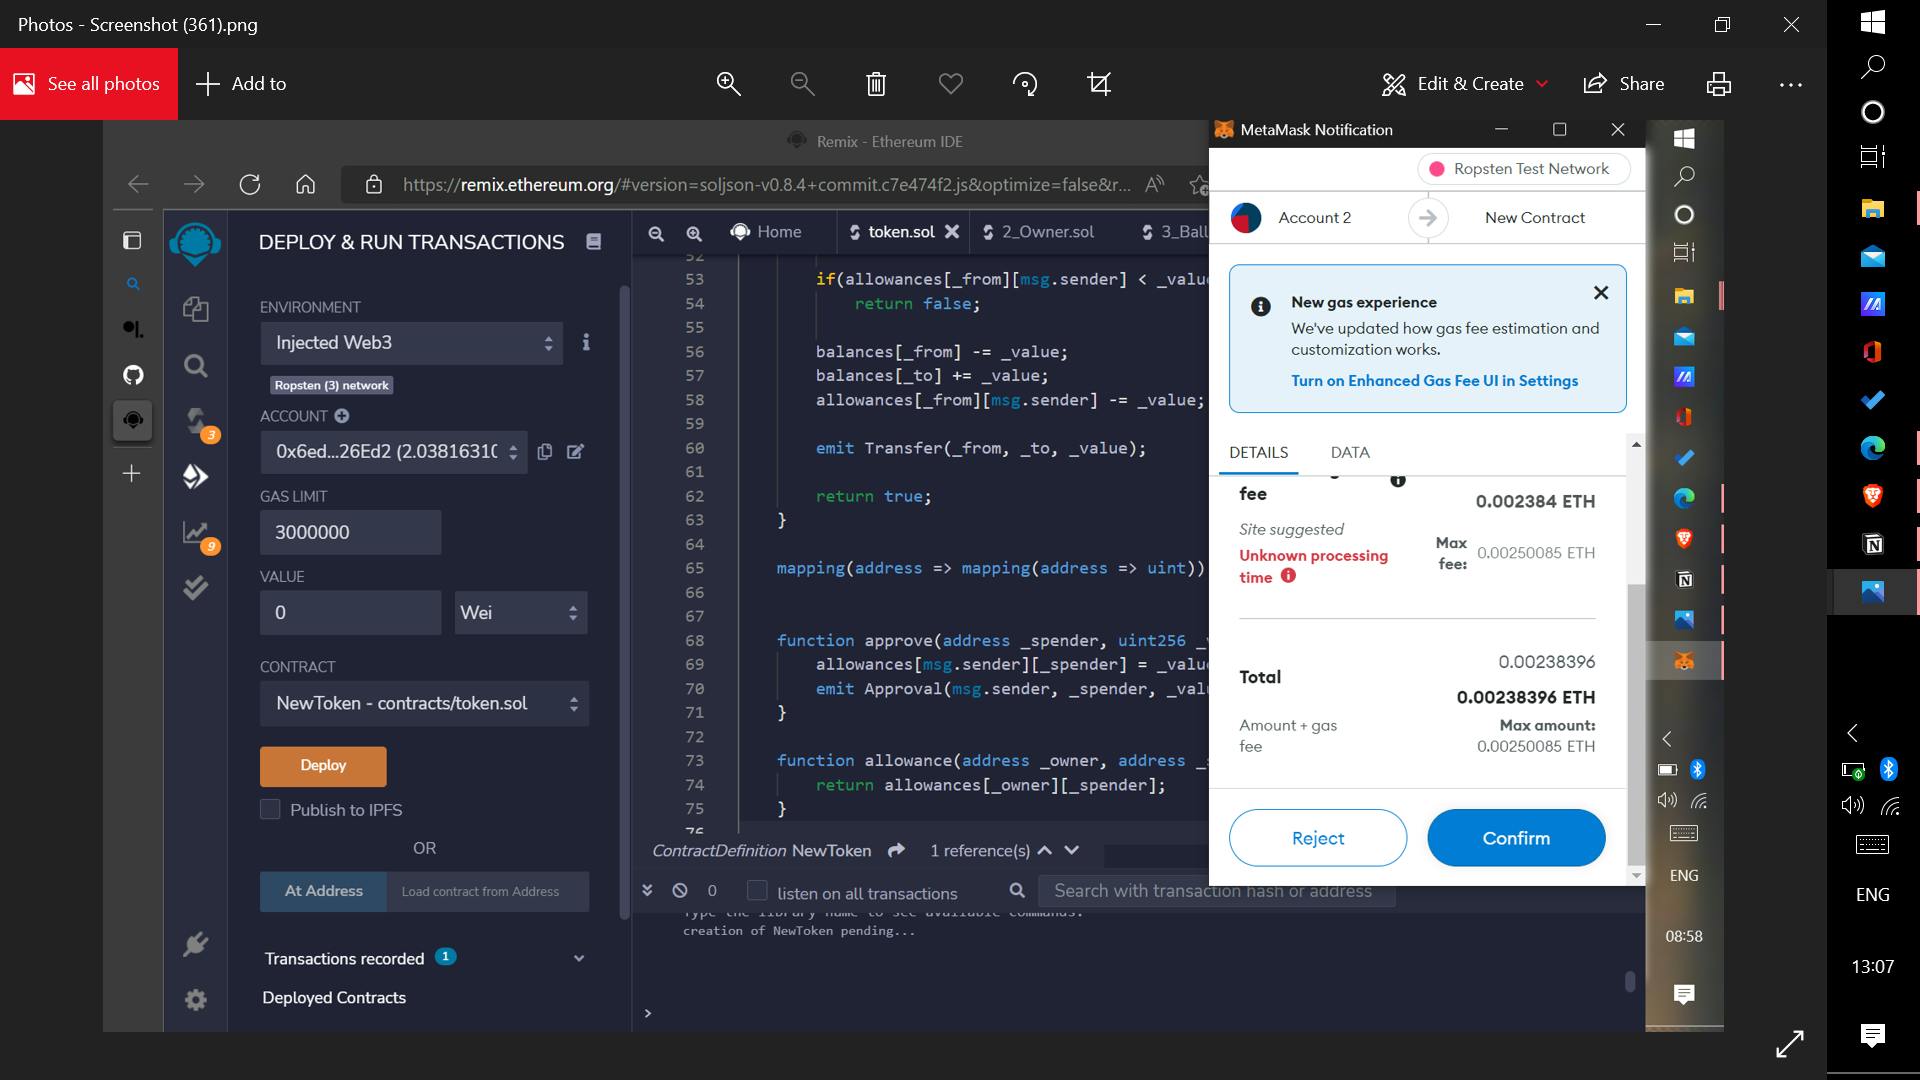
A metamask popup will appear to confirm the transaction.
Click confirm and then the transaction will get executed
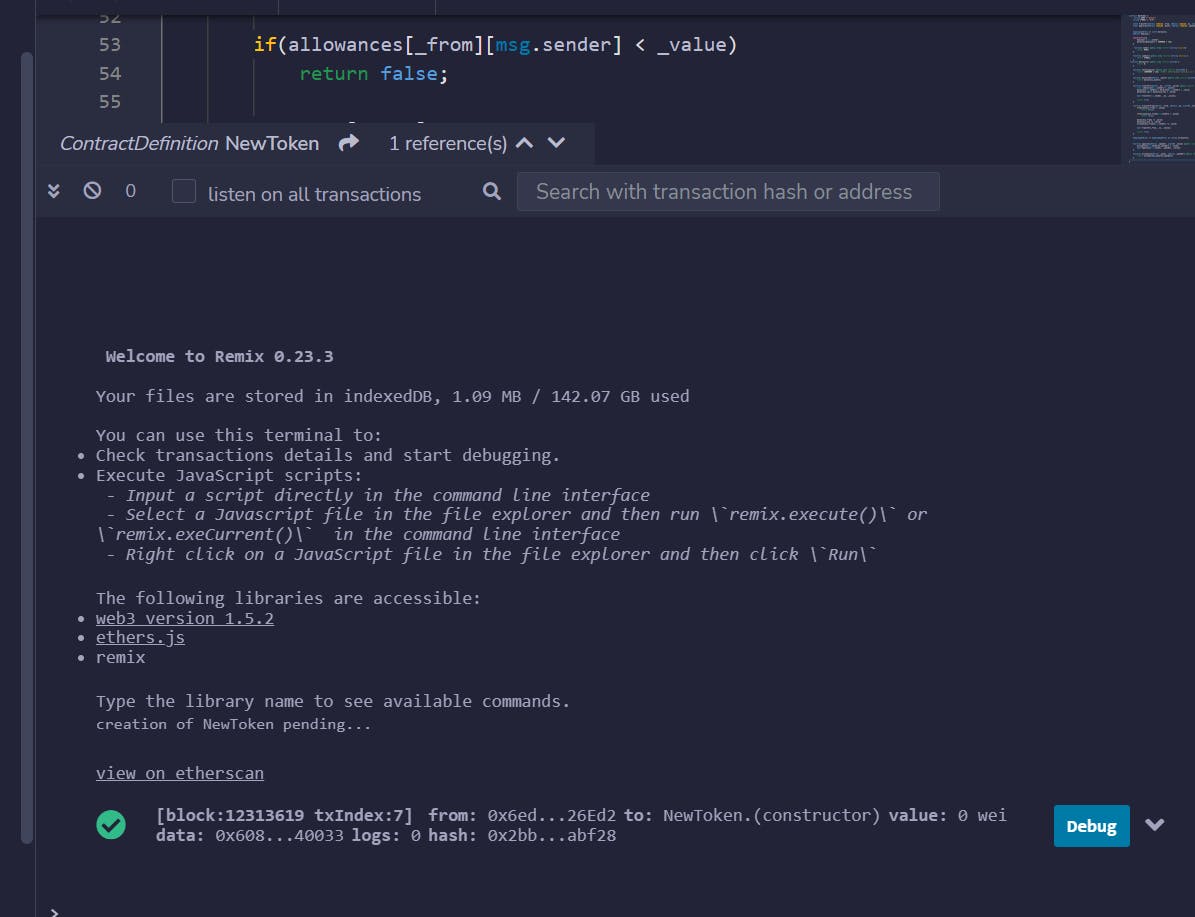
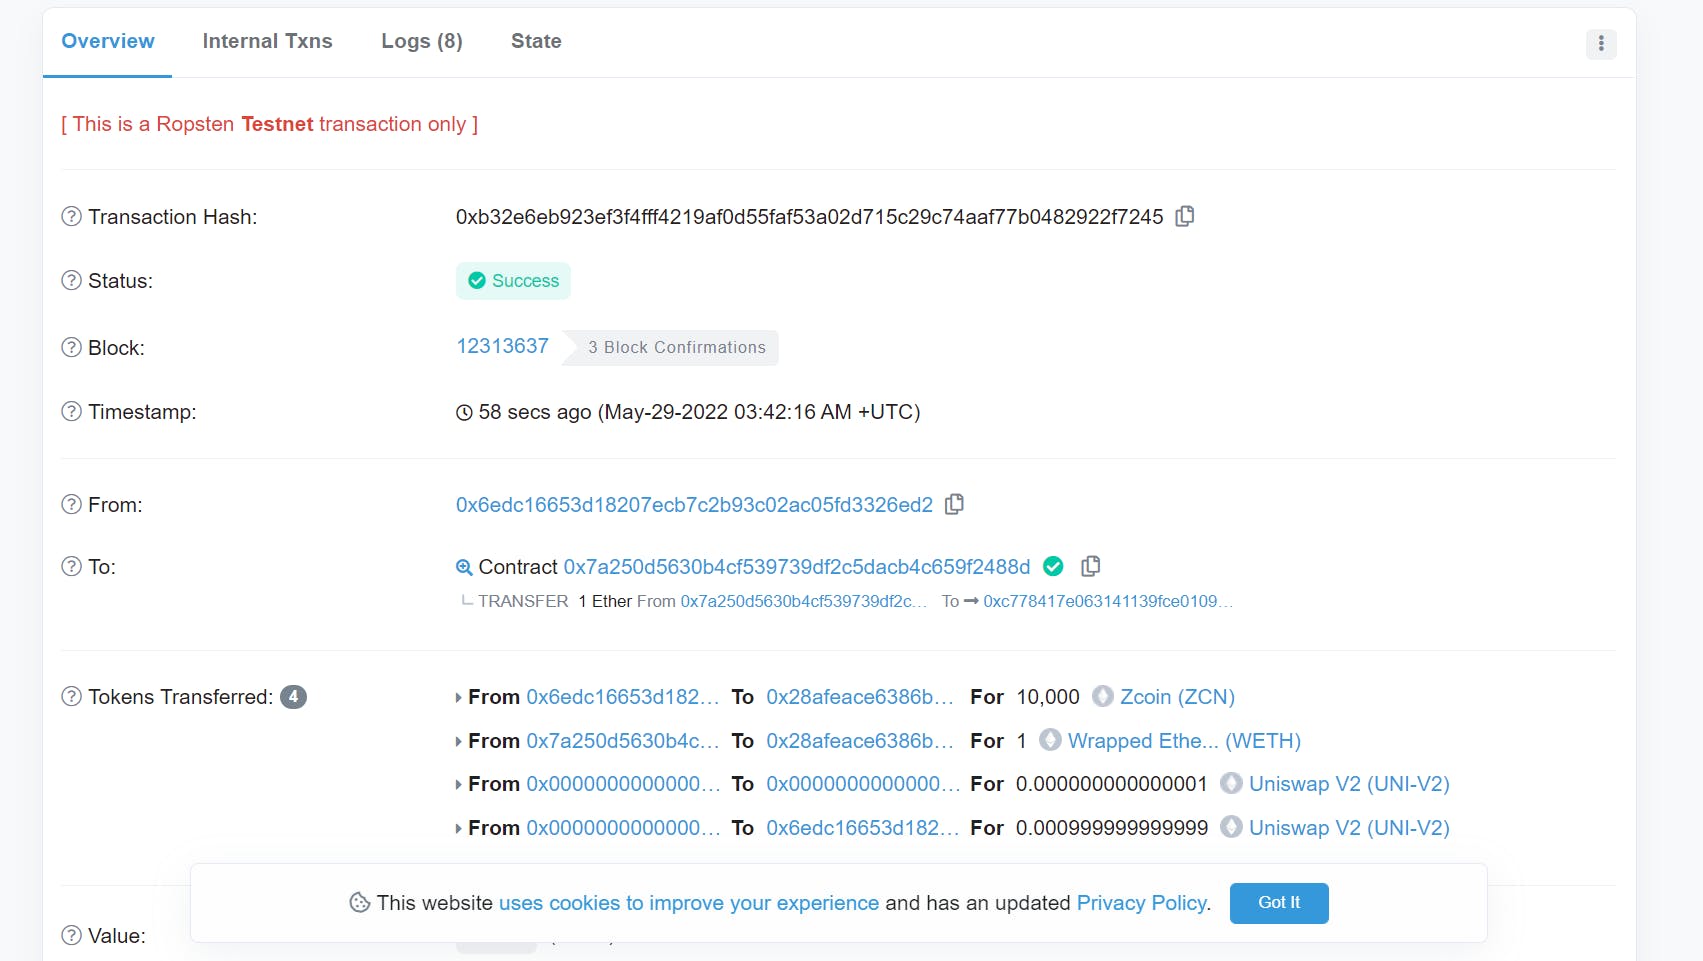
you will see a green tick sign it means that your token is deployed in the testnet
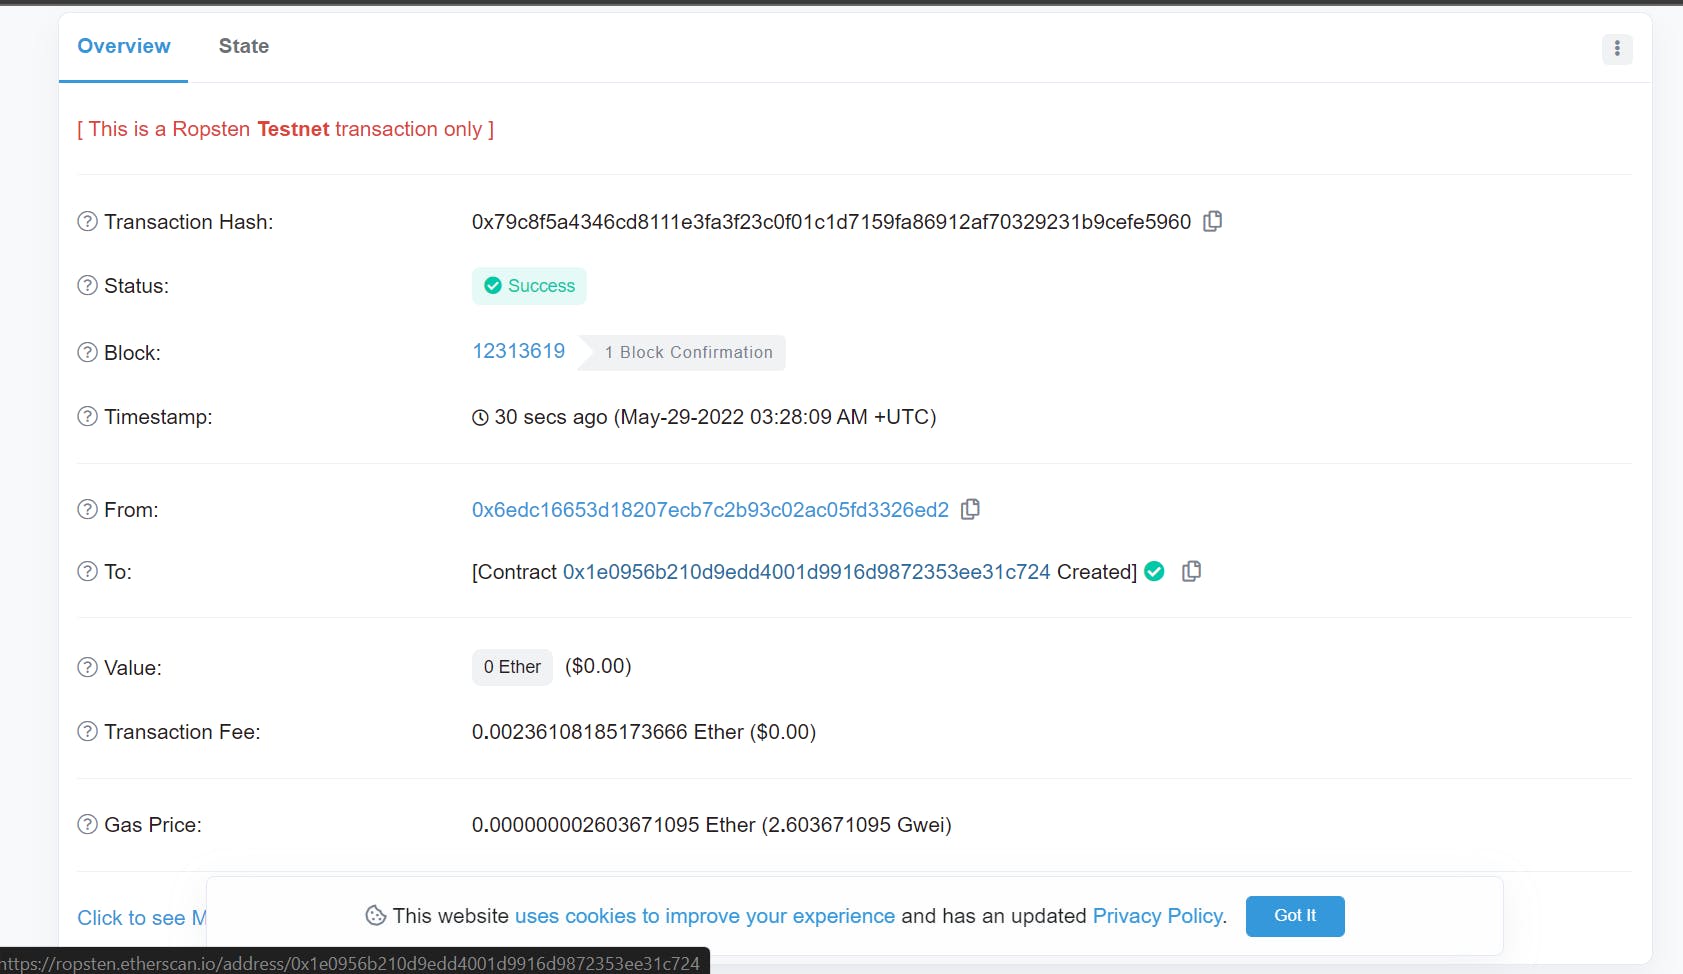
click on view on etherscan and you can see the address of your deployed contract
this is also the address of your token copy this address and let’s go forward and add our token in our metamask wallet.
Getting our new coin on metamask 🦊
Now is the time to get our tokens in our metamask wallet
Follow the steps below to do it →
- Open metamask
- In the assets section , Click on import tokens
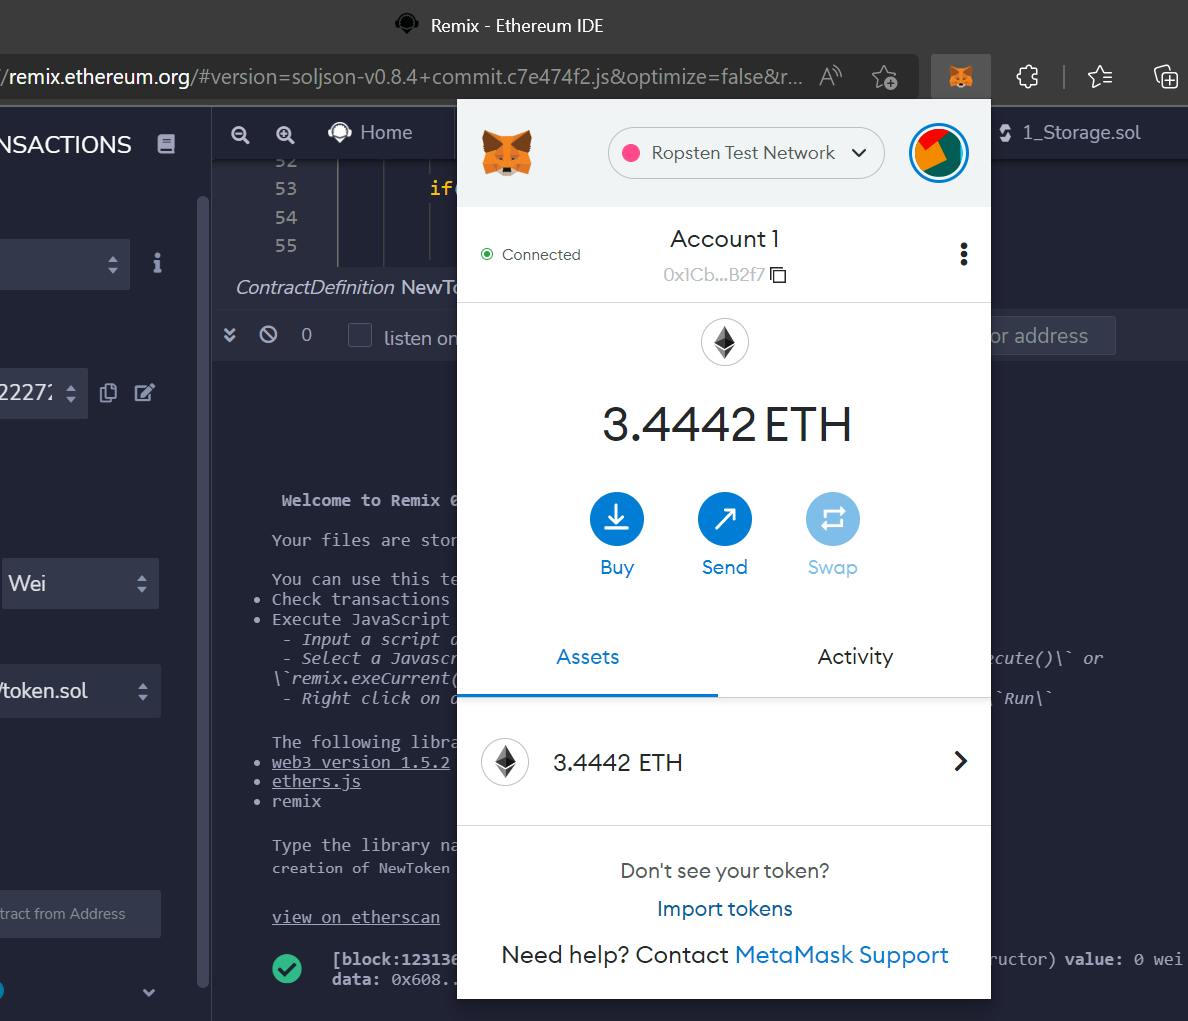
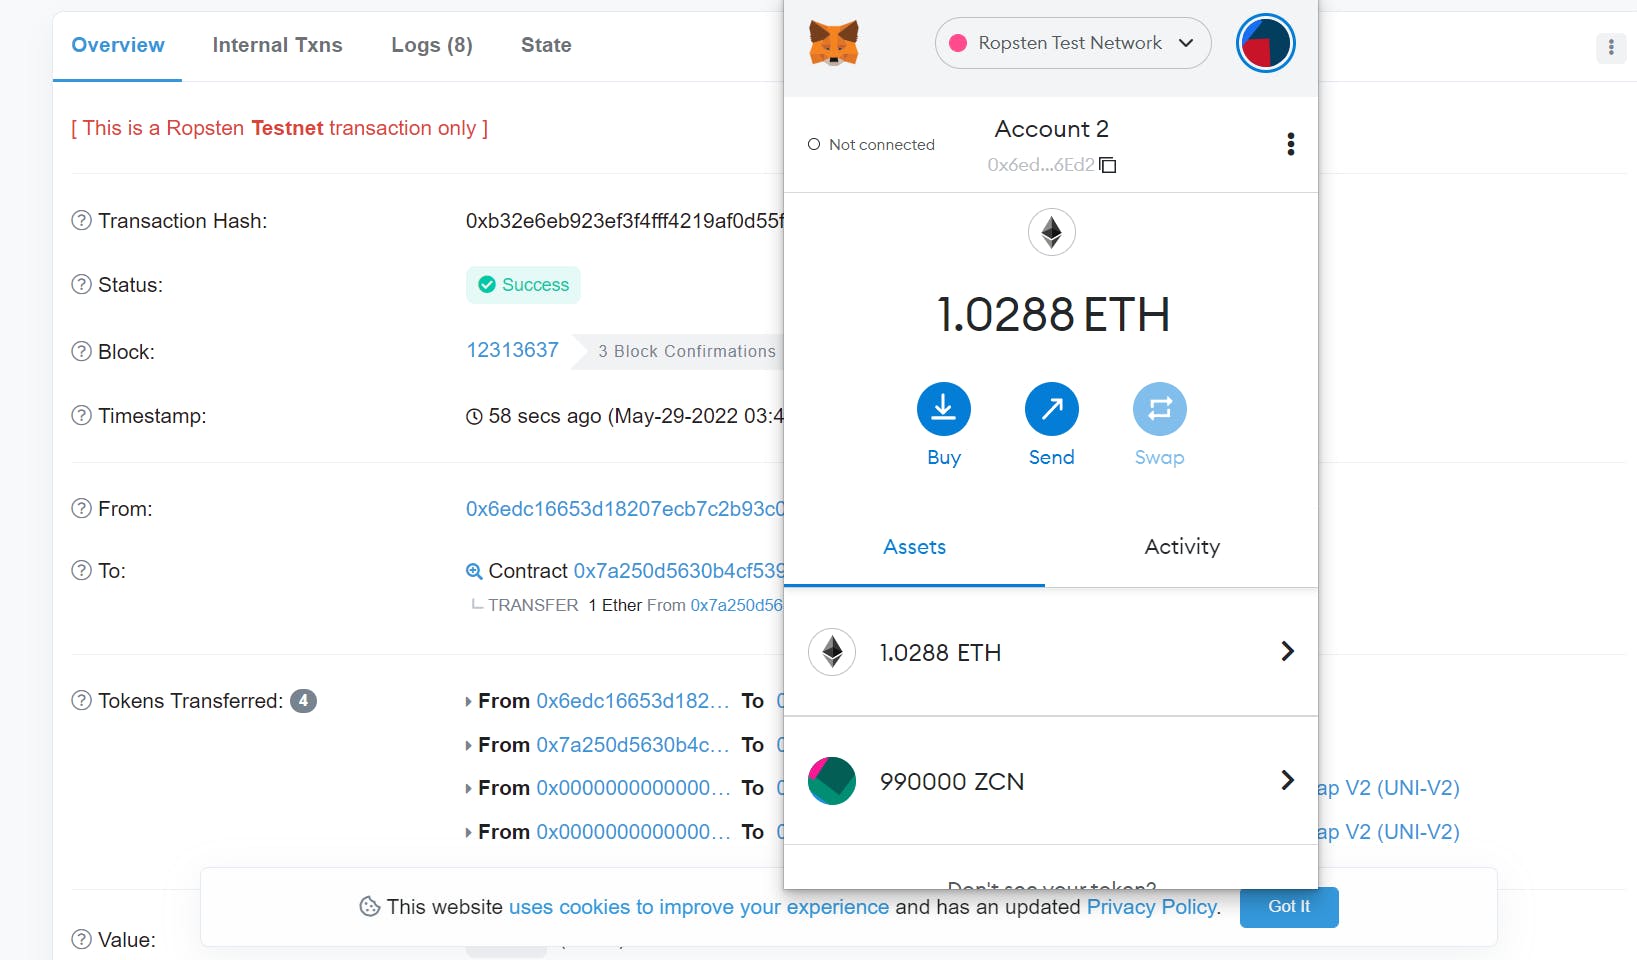
- Paste the contract address that we have copied from etherscan ,metamask will automatically detect the name and symbol of the token.
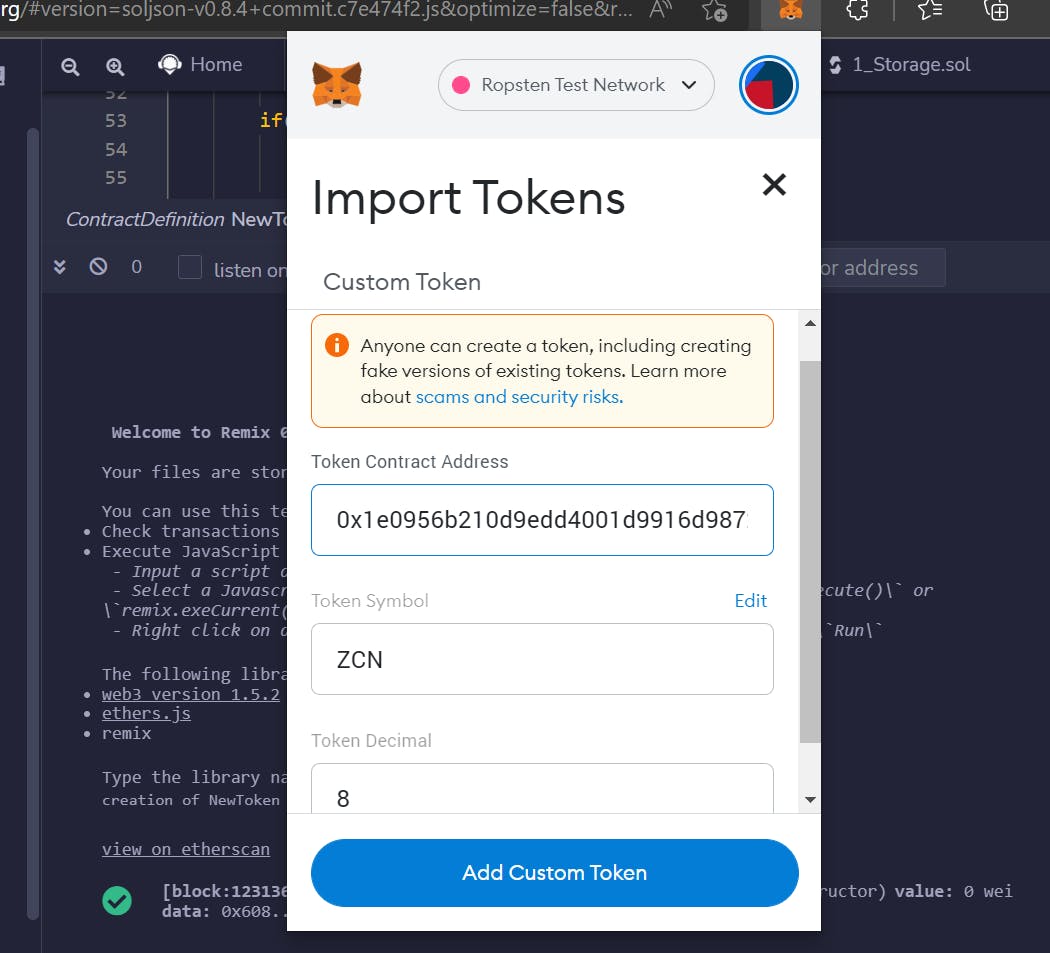
- Click on add custom token ,now you have your token in your metamask wallet.Go to the assets section and you can see your token and the balance that we rewarded ourselves with 😜.
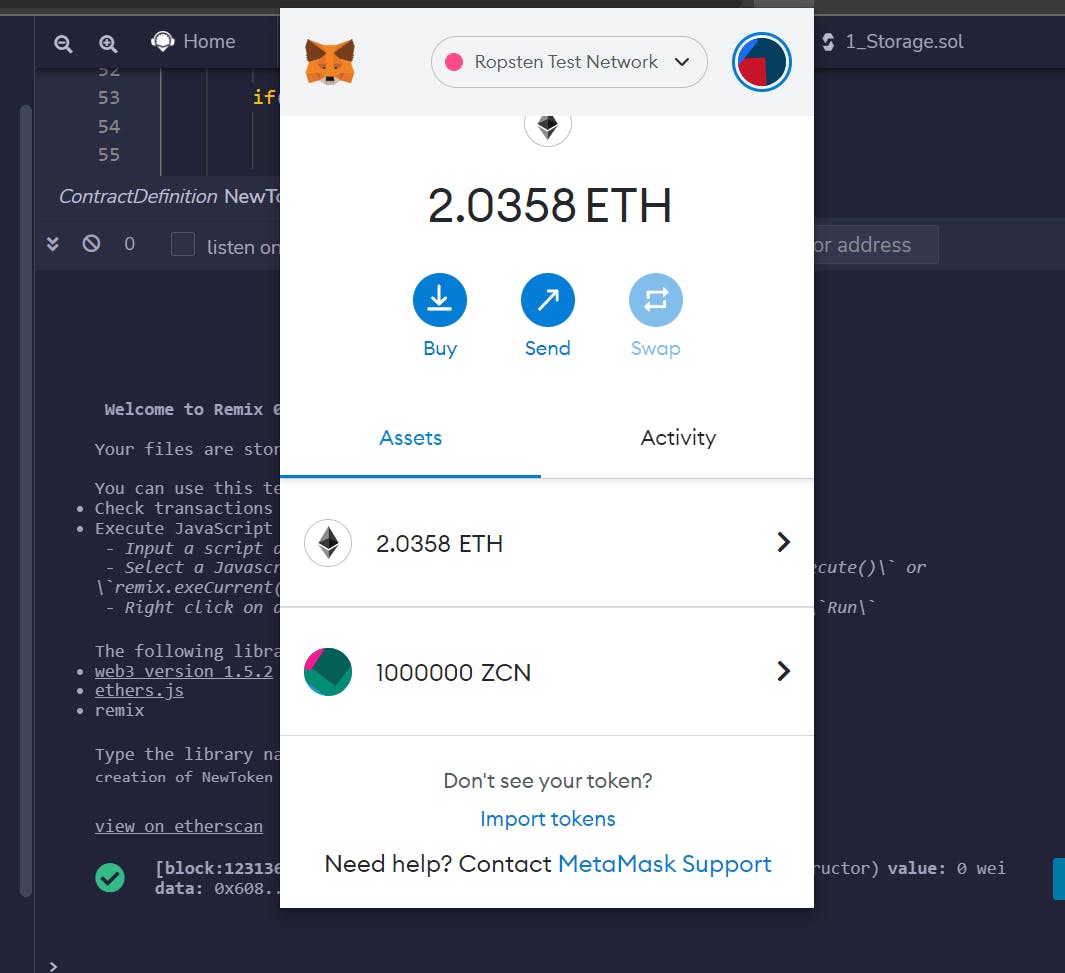
- We did it , celebrate 🤩 because you have successfully deployed your first coin on blockchain and you have your crypto coin in your wallet. 😎
Getting our coin on uniswap 🦄
Let’s list our coin on uniswap to make it trading ready
To list the token on uniswap, follow the steps below :
- Go to app.uniswap.org
- Connect your wallet and click on pool tab.
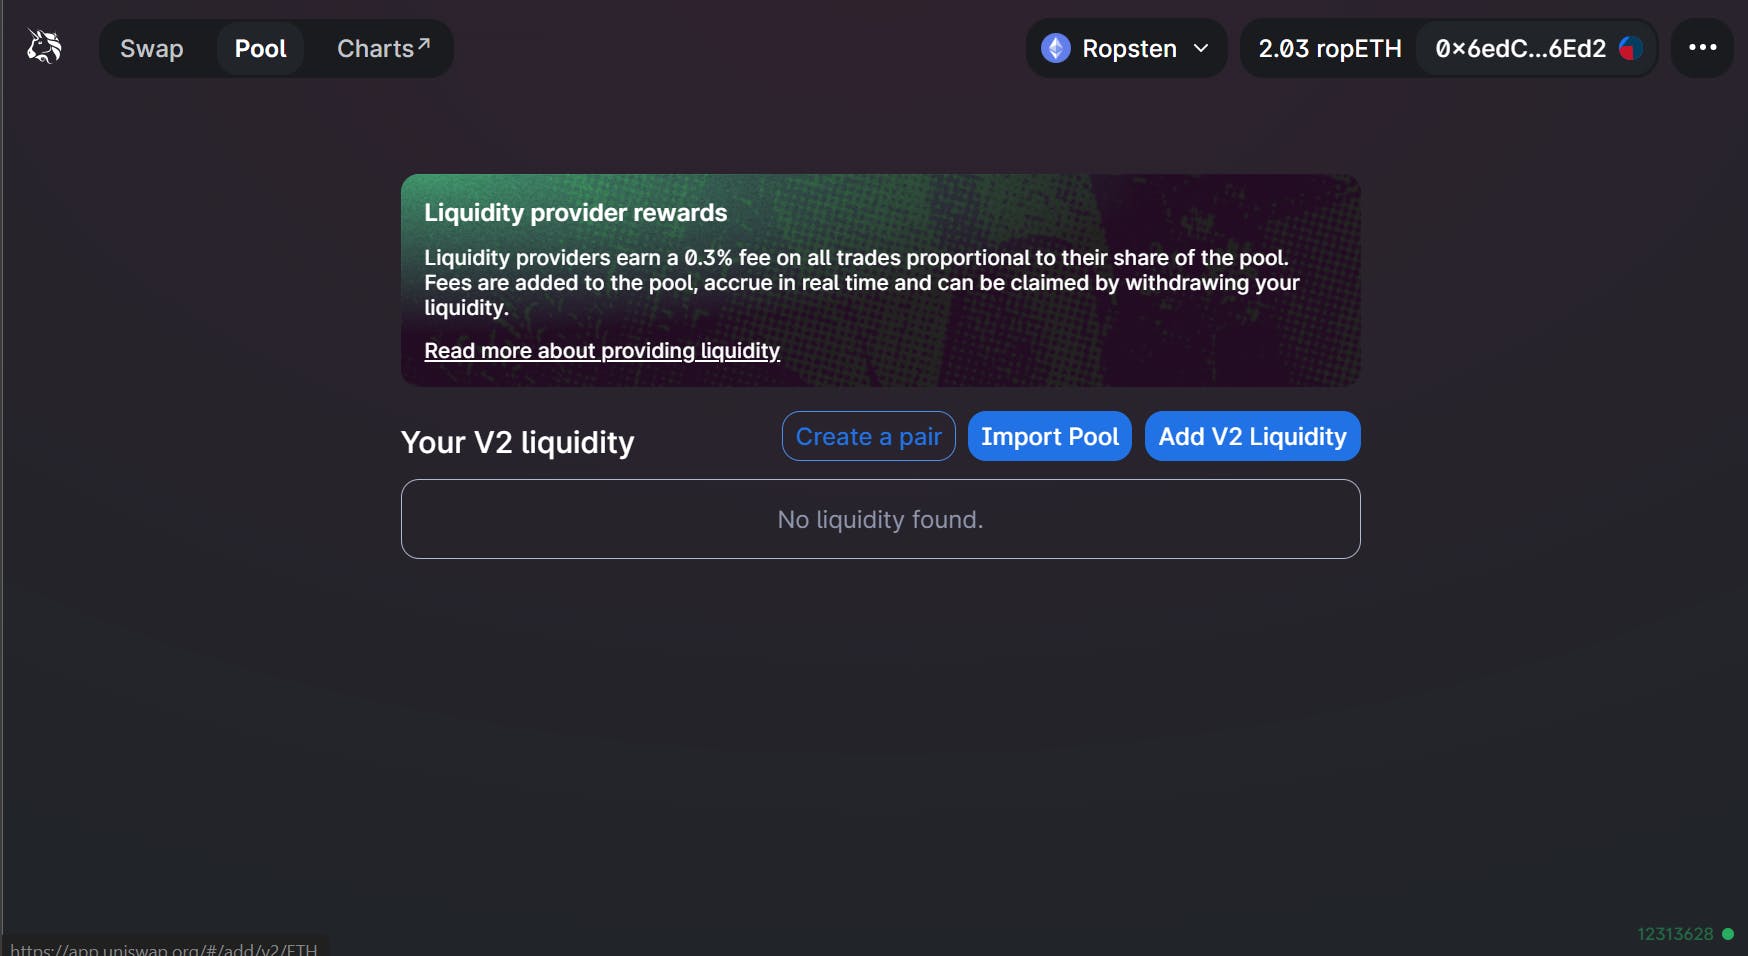
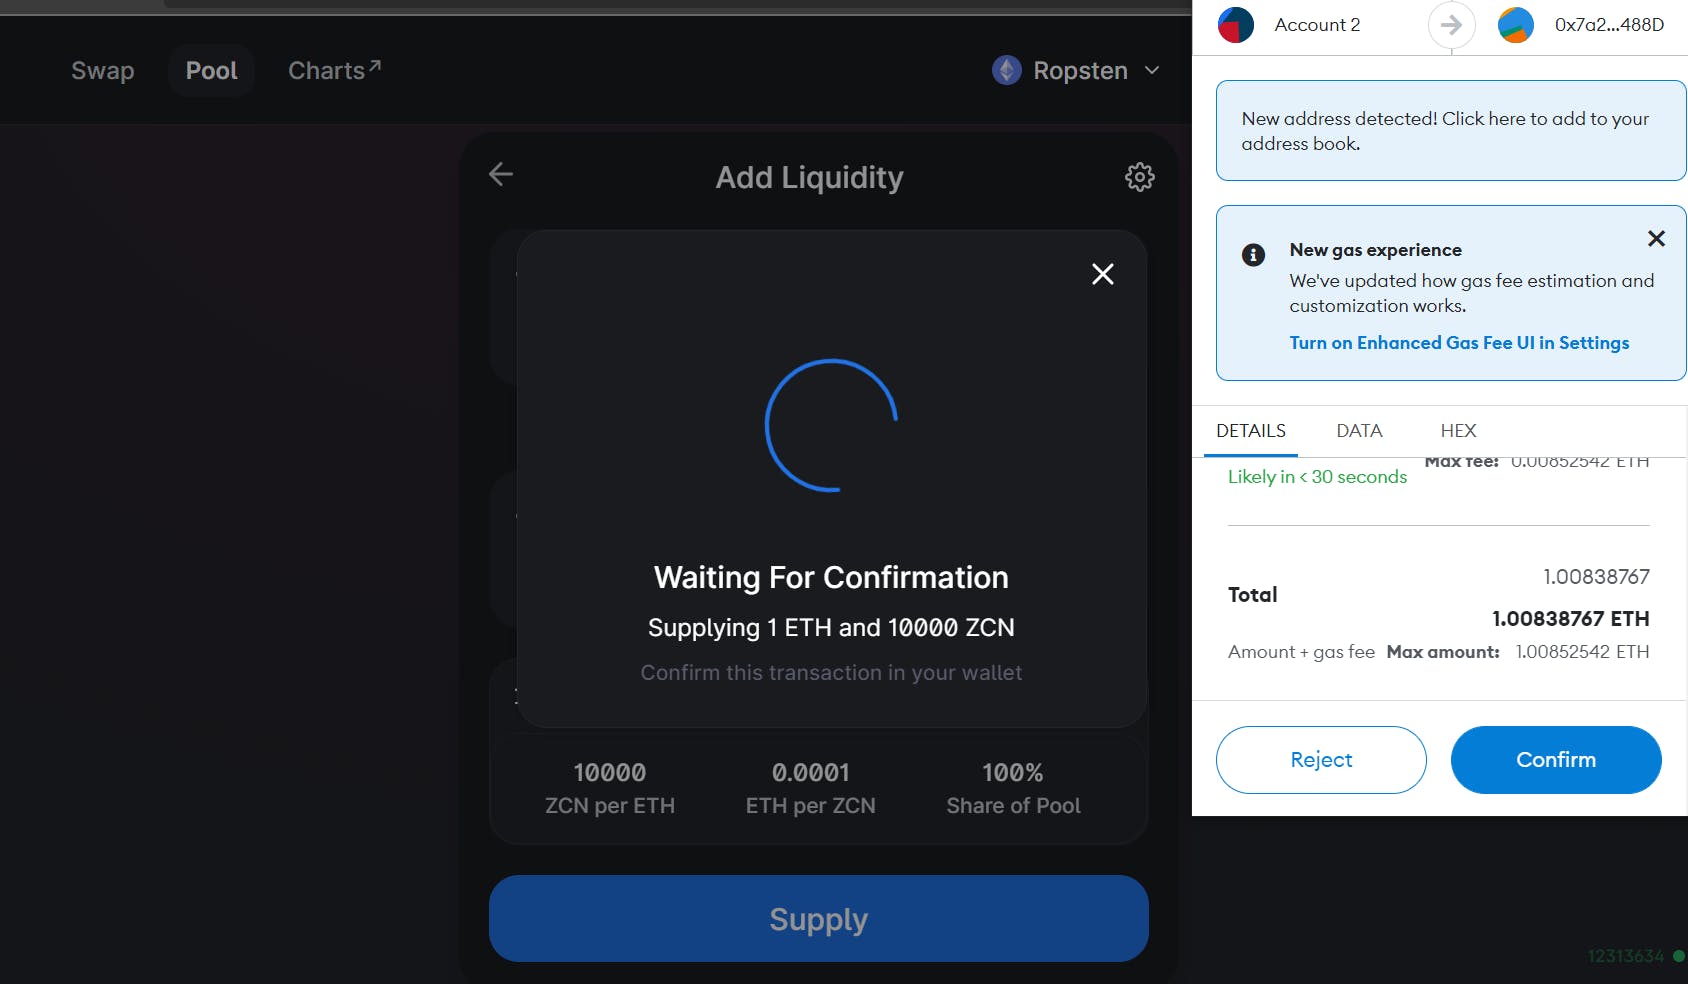
- In the pool tab click on add v2 liquidity
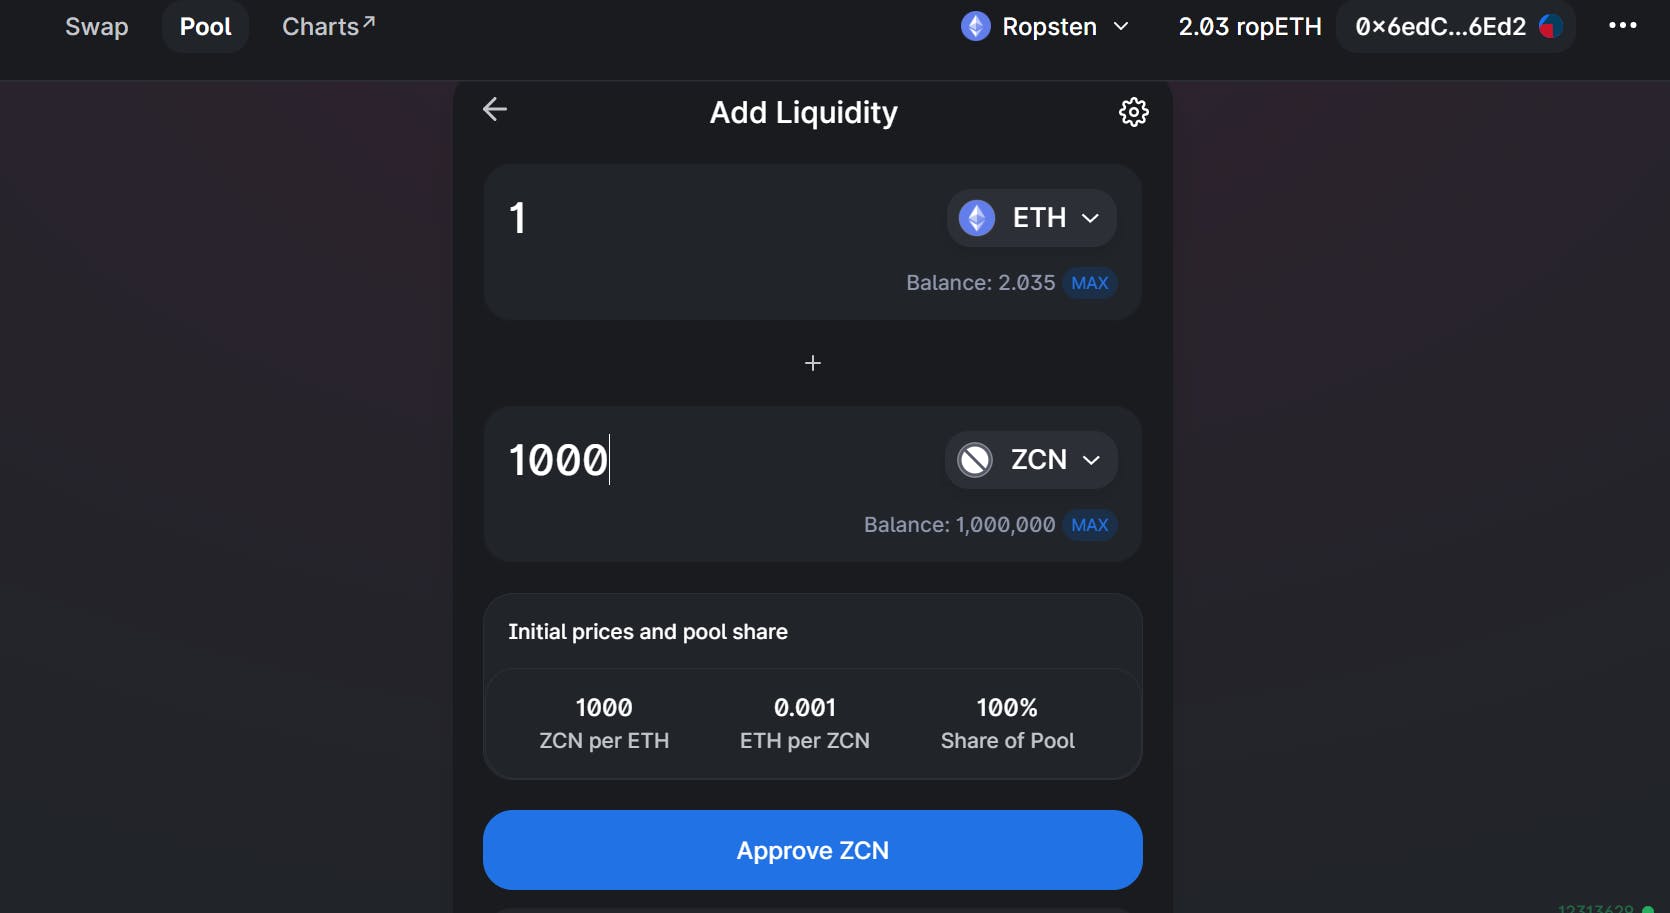
- Set the liquidity , like here we have set 1 eth equal 10000 ZCN it means we have set the initial value of 10000 ZCN equal to 1 eth ,and now we will create a liquidity pool for it .The uniswap will further take care of its price as the demand for the token rises or falls
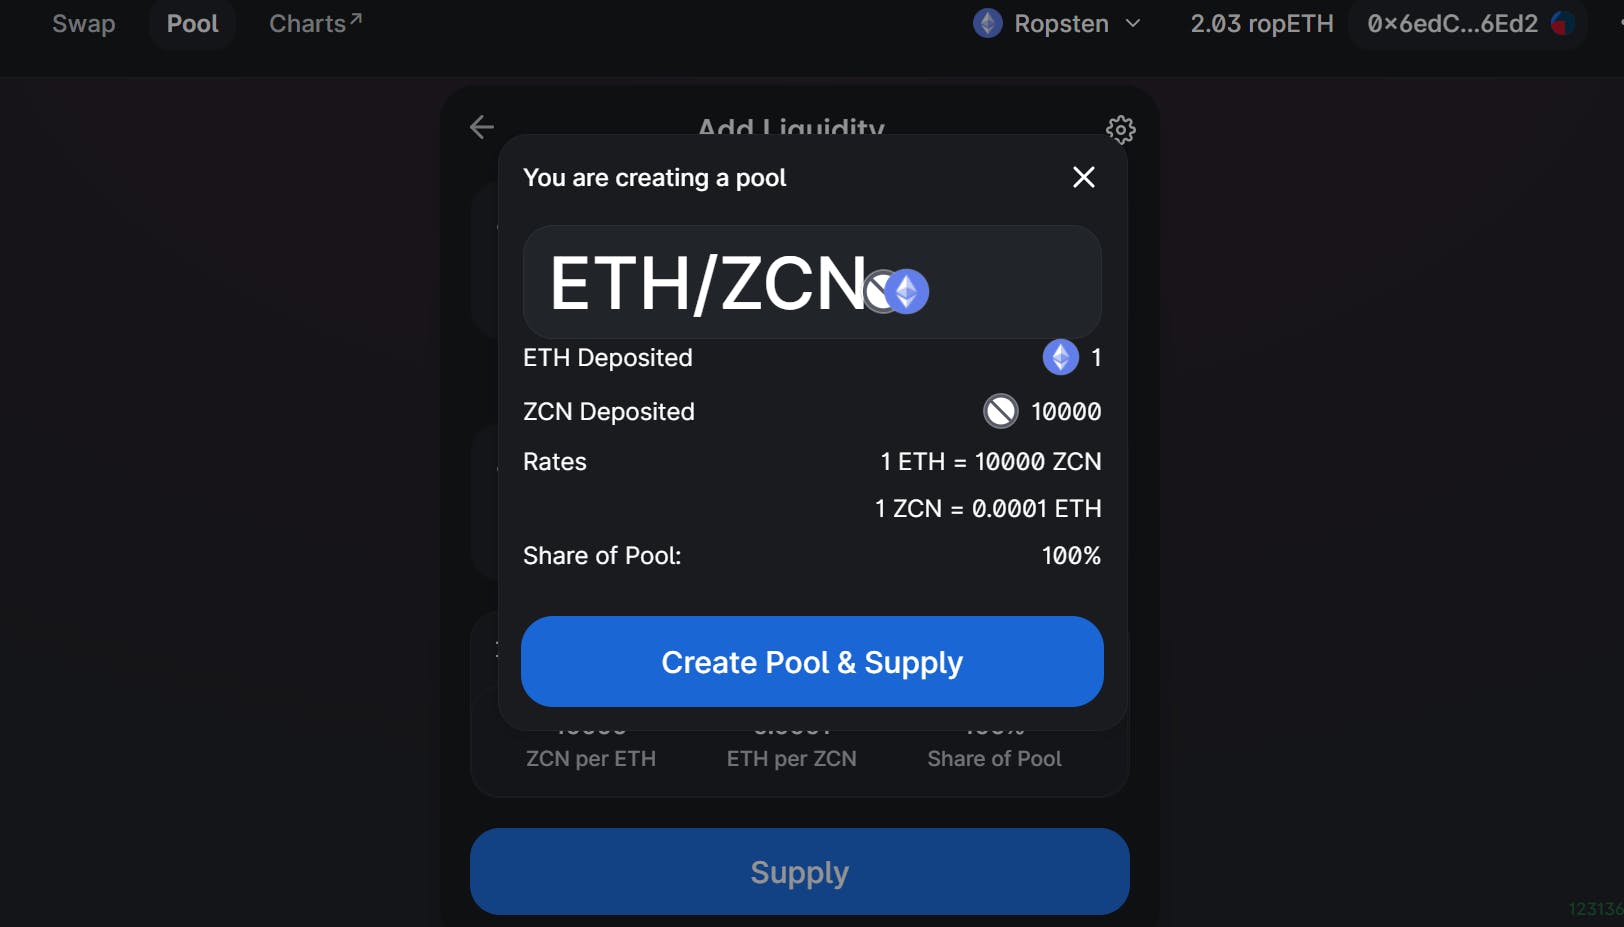
- Click on create liquidity pool, confirm the metamask transaction ,it will take some time.
- Voila ,we have listed our token successfuly on uniswap and now it is ready to be traded in crypto market. Now when you check your wallet you will see that 10000 tokens are deducted to create the liquidity pool .
The easy way
We did it ! 😤
We successfully built our token from scratch deployed it and listed on it uniswap.
You can get the full code of this course here :
https://github.com/siddhantsrivastava2002/TokenCourse/blob/main/NewToken.sol
I hate to break it to you,but we took the hard way particularly to learn about the process to make an ERC-20 token and to enhance our learning .
There is an easy way to make your token which is with the help of openzeppelin
We can make our ERC-20 token by inheriting openzepelling ERC-20 interface in our contract and with just a few lines of code and there is no problem in taking this path.
You can learn more about this method here :
https://docs.openzeppelin.com/contracts/4.x/erc20#constructing-an-erc20-token-contract
We hope that you learned and have fun in making your token with us in this course.
We will see you in our next course .
Until then Keep Learning
Signing off 😄